Saturday, June 18, 2011
Fence Fun
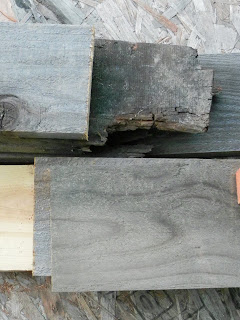
Our northern fence is in a state of mild disrepair. The planks are beautifully aged cedar, but over the years leaves and rocks have accumulated on the neighbor's side and there is quite a tilt to the fence now. So, we decided to repurpose the planks by removing, trimming and reinstalling them horizontally- and in a more architectural way. Manish is doing an awesome job and his dad has been helping too. It is taking us a little while to do and we hope to have the fence completed by the Forth of July weekend, but I am not sure.....We will see!
Monday, February 28, 2011
Time to plant?
On Friday we went out and bought a few succulents for our front walkway- hooray! But it has been sooooo cold that we have been keeping the plants on the porch covered at night and out in the sun during the day. We hope that this weekend we can finally get them in the ground. Then we will have to be even more patient while they all grow in.....hmmmm.
Friday, February 25, 2011
Finally Back!
Yay, I am finally back to posting about the house! We made such a huge push back in October and November, that I started working more than posting...So let's play catch up. When last we met....we were at drywall. Let's look at some tile- in the bathroom and the fireplace hearth.
I ran over to Mission Tile in South Pasadena to see what they had- lots of great choices. So many colors and different patterns (recognize the Intellegentsia ones?)....
Our bathroom tile was, well, there was none. It was some vinyl wall shower surround and not the vibe that we were going for. We decided subway tile- safe, I know, but just feels right in this house. We did add a little something by raiding our Heath Ceramics sample boxes. The result is really fun- you'll have to wait for the pretty pictures until the "reveal."
For the fireplace hearth, we had some funky white ceramic tiles that were not very charming or original- so they were out! This made way for my cement encaustic tiles- I have been wanting to do these for years and now there was a perfect place to put them....I ran over to Mission Tile in South Pasadena to see what they had- lots of great choices. So many colors and different patterns (recognize the Intellegentsia ones?)....
But in the end, we chose the ones below that I found online. The price was hard to beat (I think around $8 a tile- so $12 a sq. ft. or so) and the pattern and colors were just right.
Yay!!!! The tiles went together so well- we were super pleased with the way it turned out. Again, pretty pictures are coming later! :)
Sunday, September 26, 2010
Drywall Fun!
Where are we again? Ah yes, last we talked about framing....After framing, comes the relative fun of drywall. It is exciting because it makes the spaces really start to feel like "rooms" instead of framing and plywood...New drywall went up in the kitchen, the sitting room, the powder room, the laundry, a good chunk of Dillan's room and also in the Living Room....In case you haven't gone through a home renovation or new construction, a little bit about the process: The drywall sheets are screwed into the wood framing, then taped together, patched and finally finish-coated (or skim-coated). After the walls have that final layer of coat, it has to dry and then be sanded- talk about dust!!!! Here are some shots from our drywalling.
The kitchen after drywall, you can start to see the light in the space again.
Looking from the Sitting Nook into the front room.
Here is the new wall in the front room that goes into the Sitting Nook.
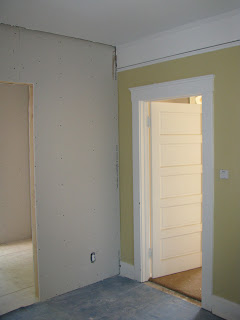
You can see where old wall meets new.
Here is the view from the Sitting Nook, through the Laundry,
into the kitchen in the distance....
Here is the new wall pop out where the fridge will go soon and the new laundry is just beyond that....
Little details, like switches!

before the walls could be refinished.
(Carlos, the drywaller, working hard to smooth out years of paint, cracks and patches...)
Drywall stilts for installing on ceilings (ours are around 9 feet tall).
(This is the truck that delivered the drywall the first day- you can see the sheets hanging off the back end. They were so heavy that the truck was less that a foot from the ground at the rear.)
As I type this post, we are very close to finished with all the drywall. Carlos is finishing the bathroom and then we will see if there is anything else that we need to do. We are getting close!!! Up next, tile inspirations....

Memo for Memo
We have a great framer who has been working on this job with us since the beginning. He is Memo, our framer extraordinaire. He has helped with the foundations, the framing, the trimming, the windows, the attic, the doors, the exterior cladding, flooring....I could go on and on, but instead, we'll just show you a few shots of Memo on the job, so you will know who he is! We are really fortunate to have his craftsmanship on this job, many people have complimented his work...and we are very happy, too. (I have added possible thoughts that may or may not have been running through Memo's mind.....)
("You want me to do what? That's not how it's done....")
("Sanding is great. I will make this piece work perfectly, you'll see.")
("When I can't make it work, I will just stab it with a tool....It works, trust me!")
("Manish, why are you making me hold this tool and pretend to work???")
He is great to have on site everyday, he always makes us smile! Thanks, Memo!!!
Monday, September 6, 2010
Framing Fun!
(part of the new powder room and built-in bookshelf for Dillan)
So now we are at the portion of the project where we are actually putting the house back together, which, I must say, is a relief! it is very disconcerting to be pulling apart something that you are paying a mortgage on, even if it will be better for it in the end. As far as the construction timeline, the framing goes in to allow the final plumbing to be put in and to allow for the electrical to be run as well. After all the framing is in and complete, and after the plumbing & electrical, we get to put up drywall and it will start to look even more like a house again.(this is the new framing for the back sitting room and laundry room floors)
(After the floor joists are in, we put down the plywood subfloor- yay! No more holes for Dillan to fall into- not that he did, but now we don't have to worry about it any more...)
(This is the new view out to the back yard from the living room..It is so nice and open now. It is a little hard to see, but the room beyond is the sitting nook and there will be double french doors that swing out.)
(This is looking back into the Living Room from the sitting nook)
(Here is the view of the back of the house. You can really see how much new framing there actually is...Now we can insulate the walls properly and waterproof them, which they didn't really do back in 1912- crazy old-timers!)
(Another view of the back of the house coming together)
(the opening on the far right is the kitchen window over the sink, and the window on the
left is the window over the laundry machines...)
(New door opening into the sitting nook. You can see where the outdoor lights will be, too.
Dillan loves to "supervise" on the job alot...)
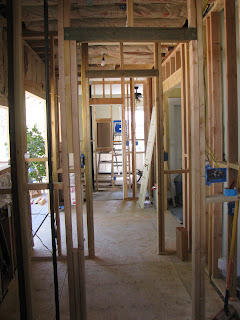
(This is the view from the kitchen, through the new laundry room, into the sitting nook
and then a little ways beyond is the powder room, too...)
(Here is the kitchen all reframed and insulated. You can also see some of the
plumbing and electrical in the walls- little blue boxes are outlets, etc...)
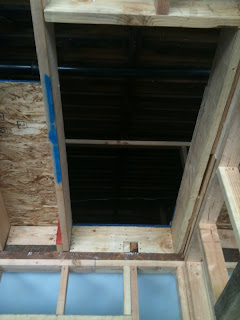
(Here is the new attic access where we will have a pull down ladder- yay storage!!!)
(Our new whole house fan, it should help to keep the hot air out...)
(The new powder room plumbing...)
(View of the new door way into the Powder Room)
Whew!!!! Okay, I think that is enough framing for now. We will cover more soon, when we get into the drywall finishes- fun! And maybe another post on painting, since we are trying to decide on colors, etc....
Wednesday, September 1, 2010
Kitchen ideas
So, in a departure from lots of fun construction photos, I thought we'd post about the inspiration for our kitchen so far. We are kind of going for a "modern-Shaker-cottage-y" look. Clean colors, simple lines...Also, we are going with walnut floors that are clean and simple. So here are some pictures of what we are hoping to capture in our kitchen- somehow! We know it won't look exactly like these super chi-chi kitchens, but we are going to try to get close....
Subscribe to:
Comments (Atom)


